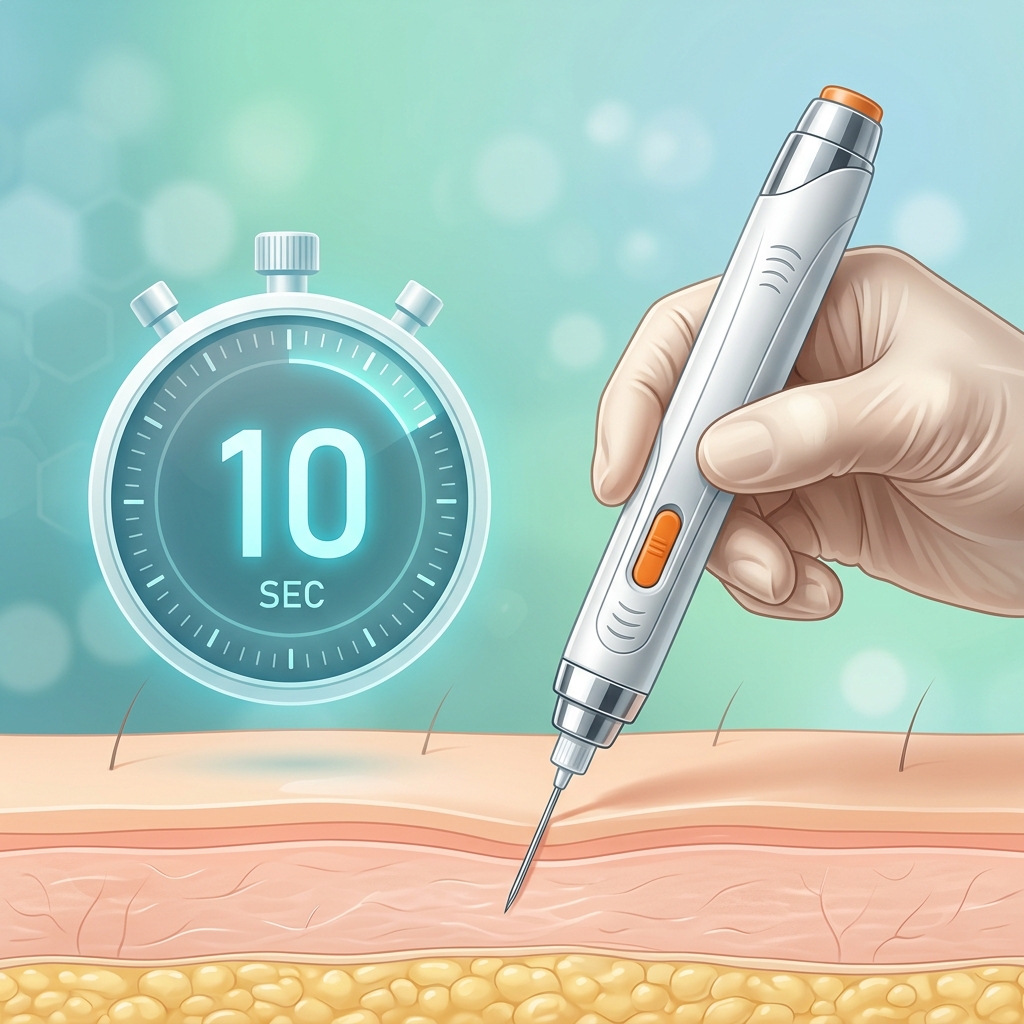
- Subcutaneous Route is Mandatory: Semaglutide must be injected into the subcutaneous fat layer (hypodermis) using a short, fine needle. It must never be administered intramuscularly or intravenously.
- Sanitation First: Wash hands thoroughly for 20 seconds, sanitize the target skin site with a 70% isopropyl alcohol swab, and let the skin air-dry completely to prevent localized stinging.
- Visual Medication Check: Inspect your vial or pen solution before drawing. The liquid must be completely clear, colorless, and free of visible particles or cloudiness.
- Three Approved Injection Zones: The primary administration sites are the abdomen (at least 2 inches away from the navel), the front/outer thigh, and the outer upper arm. Rotate sites weekly.
- The 10-Second Hold Rule: Keep the needle inserted fully for 10 slow seconds after pressing the plunger or button to prevent tracking (leakback) and ensure dose accuracy.
- Avoid Common Mistakes: Never reuse single-use needles, avoid injecting directly into stretch marks or scar tissue, and let cold medication warm to room temperature for 15-30 minutes before administration to minimize localized discomfort.
Introduction to Self-Administering Semaglutide
The clinical landscape of chronic weight management has been fundamentally transformed by the introduction of glucagon-like peptide-1 (GLP-1) receptor agonists. Semaglutide—the active pharmaceutical ingredient in brand-name Wegovy® and Ozempic®, as well as custom-prepared compounded formulations—has demonstrated profound efficacy in helping patients achieve healthy, sustainable weight loss. However, because semaglutide is a peptide hormone that is digested and deactivated by gastric enzymes if swallowed, it must be administered via once-weekly subcutaneous injections. For many patients, the prospect of self-injection causes initial anxiety, yet when executed with the correct clinical technique, the process is practically painless, highly reliable, and easily managed at home.
Whether you are using a prefilled, single-dose autoinjector pen, a multi-dose dial-up pen, or drawing compounded semaglutide from a sterile vial using an ultra-fine insulin syringe, the core biological and sanitation protocols remain identical. Setting yourself up for clinical success requires a thorough understanding of preparation, anatomy, needle physics, and post-injection care. This comprehensive guide outlines the exact clinical protocol for administering your weekly dose, explores the physiological pathways of subcutaneous drug depots, details the standard titration timeline, and addresses the most common injection mistakes to ensure you maximize your treatment efficacy while protecting your skin health.
1. The Physiology of Subcutaneous Administration
To perform an injection correctly, it is helpful to understand where the medication is going and why. The human skin is composed of three primary layers: the epidermis (the thin outer layer), the dermis (the vascularized, nerve-rich middle layer), and the subcutis or hypodermis (the fatty layer beneath the dermis). A subcutaneous (sub-q) injection delivers medication directly into this fatty layer.
Subcutaneous fat tissue contains a sparse network of small blood vessels (capillaries) compared to muscle tissue, which is highly vascularized. When semaglutide is deposited into this fat layer, it forms what is known as a physiological "depot." The relative lack of intense blood flow in fat tissue means that the peptide is absorbed into the systemic circulation at a slow, highly controlled, and steady rate. This slow uptake, combined with semaglutide's structural modifications that resist enzymatic degradation, allows the drug to maintain therapeutic levels in the bloodstream for a full seven days, enabling once-weekly dosing.
If semaglutide were accidentally injected deeper into the muscle (an intramuscular injection), the high vascularity of the muscle would cause the drug to absorb far too rapidly. This would result in an intense, sudden spike in blood concentration, which significantly escalates the severity of systemic side effects—especially gastrointestinal distress like acute nausea, vomiting, and diarrhea—while reducing the drug's therapeutic longevity over the course of the week. Conversely, injecting too shallowly into the dermis or epidermis (intradermal injection) can cause localized pain, poor drug absorption, and a higher rate of localized skin reactions. Subcutaneous administration is the clinically proven method to achieve the optimal balance of gentle systemic absorption and minimal local discomfort.
2. Step-by-Step Administration Protocol: The Visual Guide
Self-injecting semaglutide requires a methodical approach that prioritizes sterility, safety, and precision. Follow these five clinical steps every week to ensure a safe and effective administration.
Step 1: Sanitation & Preparation
The primary goal of preparation is preventing the introduction of surface bacteria into the subcutaneous tissue, which could lead to localized infections, abscesses, or cellulitis. Choose a clean, flat, well-lit surface to lay out your supplies, such as a cleaned table or countertop. Avoid high-traffic areas or damp surfaces like bathroom sinks that may harbor pathogens.
- Perform Hand Hygiene: Wash your hands thoroughly with warm water and liquid soap for at least 20 seconds, following the World Health Organization protocol. Pay special attention to the backs of your hands, between your fingers, and under your fingernails. Dry your hands with a clean paper towel.
- Prepare the Injection Site: Once you have selected your injection zone, clean the target skin area using a fresh, sterile 70% isopropyl alcohol swab. Wipe the skin in a firm, circular motion, starting at the center of the injection spot and moving outward in a circle approximately two inches in diameter. This pushes surface bacteria away from the injection point.
- Allow the Skin to Air-Dry: CRITICAL: Allow the alcohol to air-dry completely on the skin for 15 to 30 seconds. Do not blow on the skin, fan it with your hands, or pat it dry with a tissue, as this introduces new bacteria. If you insert the needle while the skin is still wet with alcohol, the needle will carry liquid alcohol into the dermis, causing a sharp, localized burning or stinging sensation that is entirely avoidable. Let it dry completely.
Step 2: Medication Check & Device Verification
Before preparing your injection, verify the physical properties of the medication and prepare the delivery system. Never inject medication that does not meet clinical standards.
- Inspect the Solution: Look through the viewing window of your semaglutide pen or hold your compounded vial up to a bright light. The liquid must be completely clear, colorless, and free of any visible cloudiness, floating particles, sediment, or discoloration. Semaglutide is a delicate peptide; if it has been exposed to extreme temperatures, direct sunlight, or rough shaking, it can denature and form tiny protein aggregates (fibrils). If the solution is cloudy, colored, or contains particles, discard it immediately.
- Verify the Dose: Cross-reference your provider's current prescription against the pen dial or the syringe markings. If you are using compounded semaglutide from a vial, you will be drawing a specific volume (measured in "units" on a U-100 insulin syringe) that corresponds to your prescribed dose in milligrams (mg). Double-check the math.
- Attach the Needle (For Pen Users) or Draw Dose (For Vial Users):
- For Pens: Pull off the pen cap. Wipe the rubber stopper at the tip of the pen with an alcohol swab. Peel the paper tab off a new, sterile pen needle. Push the needle straight onto the pen and twist it clockwise until it is tight. Pull off the outer needle cap (save it) and the inner needle shield (discard it).
- For Vials: Wipe the rubber stopper of the vial with an alcohol swab. Draw air into the syringe equal to your prescribed dose volume. Push the needle through the stopper, inject the air into the vial (this equalizes pressure), invert the vial and syringe, and slowly pull the plunger back to draw the exact unit volume. Tap the syringe to move any air bubbles to the top and gently push them back into the vial.
- Prime the Pen (If Required): If you are starting a new multi-dose pen, you must prime it to clear air from the needle. Dial the dose selector to the flow-check symbol (usually represented by a small line or droplet icon). Hold the pen with the needle pointing up and press the injection button fully. A drop of liquid should appear at the needle tip, indicating the device is ready. If not, repeat the process. Prefilled, single-dose pens do not require priming.
Step 3: Site Selection & Rotation
Subcutaneous injections are administered in areas with an abundant layer of fat tissue. There are three clinically approved anatomical zones for semaglutide injection:
- The Abdomen: This is the most common and easily accessible site. Inject into the fatty tissue at least two inches away from the belly button (navel). Avoid the midline area and do not inject anywhere near surgical scars, hard spots, or the waistband line.
- The Thigh: Inject into the front or outer aspect of the thigh (midway between the hip and the knee). This site is ideal for patients who prefer to avoid the abdomen or who experience localized sensitivity there.
- The Upper Arm: Inject into the outer, fleshy back part of the upper arm (the triceps area). Because this site is difficult to reach and stabilize yourself, it is best utilized if you have a family member or caregiver administering the injection for you.
The Importance of Rotation: You must rotate your injection site every single week. Do not use the exact same spot two weeks in a row. You can use the same general area (e.g., the abdomen), but move each weekly injection at least one to two inches away from the previous site. To track this, many patients maintain an injection log or rotate clockwise around their abdomen week-by-week. Rotating sites prevents the development of lipodystrophy (underlying fat changes) and localized micro-scarring, which can permanently impair how your body absorbs the medication.
Step 4: Needle Insertion & Injection Technique
Once the site is dried and the device is verified, it is time to administer the injection. Subcutaneous needles used for GLP-1 therapies are microscopic—typically between 4mm and 8mm in length and 31 to 32-gauge in thickness—making the injection virtually painless if proper technique is used.
- Pinch the Skin (If Necessary): If you have a healthy layer of subcutaneous fat, pinching is generally unnecessary, and you can inject directly into the flat skin. However, if you are lean, have a low body fat percentage, or are injecting into a thin area, gently pinch a 1-to-2-inch fold of skin and fat between your thumb and index finger. This lifts the subcutaneous fat away from the underlying muscle, ensuring the needle deposits the medication in the correct layer. Avoid squeezing too hard, which can compress the tissue and make the injection uncomfortable.
- Insert the Needle: Hold the pen or syringe like a dart. Insert the needle quickly and smoothly into the target site at a straight, 90-degree angle to the skin surface. Do not insert it at a shallow, slanted angle unless specifically directed by your clinical provider (which is rare for modern short needles). A quick, confident insertion minimizes discomfort.
- Deliver the Medication:
- For Pens: Press the injection button fully down. You may hear or feel a click, and the dose counter window will return to zero. Keep the button held down firmly.
- For Syringes: Press the plunger slowly and smoothly all the way down until the rubber stopper flatlines at the zero-unit mark.
Once the plunger is fully depressed or the pen dose counter hits zero, do not immediately withdraw the needle. You must hold the needle fully in place under the skin and slowly count to 10 (approximately one second per count).
This delay is biologically necessary. Subcutaneous fat tissue is dense and elastic; when a liquid volume is injected rapidly, it requires several seconds for the surrounding tissue pressure to equalize and absorb the fluid depot. If you pull the needle out immediately, the elastic recoil of the tissue will force a portion of the medication back out through the needle track (a phenomenon known as "tracking" or backflow). This leaves a wet droplet of semaglutide on your skin and results in an incomplete dose. Holding for 10 seconds guarantees that the entire therapeutic volume remains sealed within the subcutaneous fat depot.
Step 5: Post-Injection Care & Safe Disposal
Completing the injection process correctly protects your skin and prevents accidental needle sticks.
- Withdraw the Needle: After counting to 10, release your pinch on the skin (if you were pinching) and pull the needle straight out at the same 90-degree angle. This clean withdrawal prevents the needle from scraping or tearing the dermis, which can cause micro-bleeding and bruising.
- Apply Gentle Pressure (If Needed): You may notice a tiny drop of blood or a small bump at the injection site. This is normal. If bleeding occurs, press a clean cotton ball or gauze pad gently against the site for 5-10 seconds. Do not rub or massage the area. Rubbing the site frictionally increases local blood circulation, which speeds up drug absorption too rapidly, increasing the likelihood of systemic side effects and raising the risk of localized bruising.
- Safe Sharps Disposal: NEVER throw used needles, syringes, or single-use pens into standard household trash. Place them immediately into an FDA-cleared sharps container. If you do not have an official sharps container, you can use a heavy-duty, puncture-resistant plastic container with a tight-fitting screw cap (such as an empty laundry detergent bottle). Once the container is three-quarters full, seal the lid with heavy-duty tape and dispose of it according to your local community waste guidelines.
Compounded Semaglutide Starting at $79/Month
Get access to compounded semaglutide from U.S. licensed 503A sterile compounding pharmacies. Our all-inclusive monthly pricing includes your digital provider consultation, ongoing clinical support, and expedited shipping directly to your door.
Start Your Assessment3. Understanding Common Injection Mistakes
Even though self-injecting semaglutide is straightforward, patients occasionally develop bad habits that compromise their safety, comfort, or dose accuracy. Below are the four most common injection mistakes and how to avoid them.
Reusing Single-Use Needles
Needles designed for insulin syringes and pen autoinjectors are strictly manufactured for single-use. They are coated with a microscopic layer of silicone lubricant to slide effortlessly through the skin. Reusing a needle strips this lubrication, causing the needle to drag and catch on the tissue, resulting in pain. Furthermore, the micro-fine tip of a 31G or 32G needle is incredibly delicate; upon its first insertion, the tip bends, curls, and develops microscopic barbs. Reinserting a barbed needle causes localized tissue tearing, increased bruising, and severe skin irritation. Most importantly, once a needle has touched your skin, it is no longer sterile. Reintroducing a contaminated needle into a multi-dose vial or back into your skin can lead to painful bacterial infections and subcutaneous abscesses. Always use a fresh needle for every single injection.
Injecting Directly Into Stretch Marks or Scar Tissue
Stretch marks (striae) and surgical or injury scars are composed of dense, fibrotic collagen fibers rather than normal, healthy skin and subcutaneous fat. This dense connective tissue has a significantly reduced supply of blood vessels and capillaries. If you inject semaglutide directly into a stretch mark or scar, the medication will not absorb smoothly. It may sit in the dense tissue for an extended period, leading to an erratic absorption profile and reduced clinical efficacy. Additionally, injecting into dense scar tissue requires more force, can bend the micro-needle, and often causes increased localized pain or hard, long-lasting subcutaneous nodules. Always examine your skin and choose a site that is clear of striae, scars, bruises, and active inflammation.
Injecting Cold Medication
Semaglutide is a peptide hormone that must be stored in the refrigerator between 36°F and 46°F (2°C to 8°C) to maintain molecular stability. However, injecting liquid at refrigeration temperature is a common cause of injection-associated pain. Cold liquid is physically denser and more viscous; when forced into the warm subcutaneous tissue, it triggers a sudden temperature gradient that stimulates local nociceptors (pain receptors) and smooth muscle fibers, causing a sharp, stinging pain and muscle spasms. To prevent this, pull your vial or pen out of the refrigerator 15 to 30 minutes before your injection. Let it sit on your clean preparation surface to warm naturally to room temperature. This brief warming period is completely safe for the peptide and will make the injection feel virtually imperceptible.
Failing to Wait the Full 10 Seconds
Subcutaneous fat does not instantly expand to accommodate the rapid introduction of injected liquid. Autoinjector pens release their dose via a compressed internal spring in a fraction of a second. If you withdraw the needle immediately, the high localized fluid pressure forces a significant portion of the dose to leak back out of the needle puncture, appearing as a clear droplet on your skin. Because semaglutide doses are highly concentrated micro-volumes (often just 0.1 mL to 0.5 mL), losing even a single drop can represent 10% to 25% of your weekly dose. Holding the needle in place for 10 seconds allows the liquid to diffuse into the fat tissue, equalizing pressure and preventing leakage.
4. The Standard Titration Timeline: Why Dose Escalation Matters
A central pillar of successful semaglutide therapy is gradual dose escalation, a clinical process known as titration. Because GLP-1 receptors are highly expressed not only in the pancreas and liver but also throughout the enteric nervous system (the gut) and the area postrema of the brainstem (the brain's vomiting center), introducing a high dose of semaglutide immediately would cause severe, intolerable gastrointestinal side effects.
Gradual titration allows your body's GLP-1 receptors to slowly downregulate their sensitivity and adapt to the increased hormone levels. This adaptation minimizes side effects like nausea, acid reflux, and constipation while allowing you to safely build up to a therapeutic maintenance dose. The standard clinical escalation schedule follows a 5-step, monthly protocol:
It is important to note that while the 2.4 mg dose is the target maintenance dose established in clinical trials, weight loss is highly individualized. Many patients achieve outstanding, sustainable results on lower maintenance doses, such as 1.0 mg or 1.7 mg. Working closely with your healthcare provider allows you to tailor this schedule to your specific metabolic response, potentially staying at a lower dose if your weight loss is consistent and side effects are well-managed. If you want to know more about the safety and compounding parameters of this drug, consult our guide on the safety of compounded semaglutide and read our complete guide to semaglutide for details on its clinical efficacy.
5. Managing Localized Injection Site Reactions
Even with flawless technique, injecting any foreign substance through the skin can trigger localized physical responses. These are referred to as injection site reactions. The most common manifestations include transient redness (erythema), mild swelling, localized itching (pruritus), and minor bruising. Under normal circumstances, these reactions are mild, occur within a few hours of injection, and resolve spontaneously over 24 to 72 hours without clinical intervention.
Redness and itching are frequently caused by a minor localized immune response. When the needle punctures the dermis, it triggers the release of histamine from local mast cells. Bruising occurs when the needle accidentally nicks a tiny capillary in the dermal or subcutaneous layer, causing a small amount of blood to leak into the surrounding tissue. If you experience persistent itching or localized hives, a cold compress or a thin layer of over-the-counter 1% hydrocortisone cream can provide rapid relief.
However, it is important to distinguish between normal, mild injection site reactions and clinical signs of infection or severe systemic allergic reactions. If you notice swelling that spreads rapidly, severe pain, heat radiating from the injection spot, or yellow pus leaking from the puncture, you may have developed a localized bacterial infection that requires prescription antibiotics. Furthermore, if you experience systemic symptoms like widespread hives, swelling of the face, tongue, or throat, dizziness, or difficulty breathing, you must seek emergency medical care immediately, as these are signs of anaphylaxis. For a detailed analysis of skin reactions, prevention tips, and when to speak with a physician, read our full article on managing semaglutide injection site reactions.
Frequently Asked Questions
For brand-name semaglutide pens (Wegovy® or Ozempic®), they can be stored at room temperature (up to 86°F or 30°C) for up to 56 days. If they exceed this temperature or time, they must be discarded. For compounded semaglutide vials, check the specific Beyond Use Date (BUD) and compounding pharmacy instructions. Many compounded vials require continuous refrigeration since they lack the same preservative levels as brand-name formulations, while others allow room temperature storage for 28-56 days if kept away from light and extreme heat.
If you miss a dose of semaglutide, follow the '5-day rule.' If your next scheduled dose is more than 2 days (48 hours) away, inject the missed dose as soon as you remember. Then resume your normal weekly dosing schedule. If the missed dose is remembered within 2 days of your next scheduled dose, skip the missed dose entirely and inject your next dose on your regular day. Never take a double dose to make up for a missed one.
Yes, a small air bubble is completely normal and safe. Subcutaneous tissue has a rich capillary network but is distinct from the vascular system, meaning small amounts of injected air do not pose a risk of embolism. If you are drawing medication from a vial and notice a large air gap, tap the syringe gently with the needle pointing upward so the air rises to the top, then push the plunger slightly to expel the air before injecting.
No. You must rotate your injection site weekly. Injecting into the exact same localized spot repeatedly can lead to lipohypertrophy—an accumulation of fatty tissue—or localized scarring. This tissue change can cause the medication to absorb erratically or incompletely, reducing its clinical effectiveness. You can use the same general area (like the abdomen) but should move the injection site at least one to two inches away from the previous site.
Localized skin reactions—including mild redness, swelling, itching, or bruising—are common and usually benign injection site reactions. Redness and itching are typically caused by a mild localized histamine release. Bruising occurs when the needle nicks a tiny capillary under the skin. To minimize reactions, ensure you inject at a 90-degree angle, do not rub the site post-injection, and let the alcohol dry completely before injecting. If you experience severe swelling, hives, or breathing difficulties, seek immediate medical attention.
Brand-name pens (Wegovy® or Ozempic®) are auto-injectors where the needle is hidden or attached and you press a button to release the dose. Compounded semaglutide is typically supplied in a multi-dose vial, requiring you to manually draw the liquid into a disposable U-100 insulin syringe. While using a syringe requires a few extra steps (drawing the medication and measuring the units), the needles are microscopic (usually 31-gauge, 5/16 inch) and virtually painless. It also allows for precise dosing adjustments.
Compounded Semaglutide Program — Only $79/Month
No insurance required, flat-rate pricing, and free cold-chain shipping. Complete a simple health questionnaire and receive a personalized weight loss plan prescribed by a U.S. licensed provider.
Check My EligibilityClinical References & Sources
- Wilding, J. P. H., Bateman, A. H., et al. (2021). Once-weekly semaglutide in adults with overweight or obesity. New England Journal of Medicine, 384(11), 989-1002. ClinicalTrials.gov (NCT03548935)
- Davies, M. J., Færch, L., et al. (2021). Semaglutide 2.4 mg once weekly in adults with overweight or obesity, and type 2 diabetes (STEP 2): a randomised, double-blind, double-dummy, placebo-controlled, phase 3 trial. The Lancet, 397(10278), 971-981. ClinicalTrials.gov (NCT03552757)
- Kushner, R. F., Calanna, S., et al. (2020). Semaglutide 2.4 mg for the treatment of obesity: key elements of the STEP clinical trial program. Obesity, 28(6), 1050-1061. PubMed (PMID: 32441473)
- American Diabetes Association. (2026). Standards of Care in Diabetes—2026. Diabetes Care, 49(Suppl. 1), S1-S292. Diabetes Care Journal
- U.S. Food and Drug Administration. (2021). Wegovy (semaglutide) injection, for subcutaneous use [prescribing information]. Novo Nordisk Inc. FDA Drug Approvals